First of all, Thank you so much for purchasing this template and for being our customer.
You are awesome!
This documentation is to help you regarding each step of customization. Please go
through the documentation carefully to understand how this template is made and how to edit
this properly.
When you purchase Kurt Theme from Themeforest, you need to login your account and
download theme files from Themeforest. Please make sure you downloaded All file &
Documentation option.
WordPress Setup
To install this theme you must have a working version of WordPress already installed. If you
need help installing WordPress, please follow the instructions in WordPress
Codex
If you are a very new to WordPress world, I recommend you to check some useful resources on
how setup and use WordPress:
WordPress Codex – general information related
to WordPress
installation on your server.
After you’ve made a purchase on Themeforest, you’ll need to download theme files from your
Themeforest Account. To do this, simply navigate to Downloads tab and find
purchased item Kurt - Ajax Portfolio WordPress.
Note
You can choose to download everything or just a WordPress theme .zip archive. The
difference is explained below.
All Files & Documentation
In the package you will find:
Below is the folder structure and needs to be uploaded to your website root directory:
Kurt.zip - main theme file. You can install it through WordPress admin
panel. If you install it via FTP then unzip it first and use the extracted folder.
Kurt-child.zip - child theme. For advanced users who are about to make
code changes.
Demo Content - folder that contains all the demo data. Demo is really
helpful to get you familiar with all the theme features and possibilities. Setting up
demo data is covered in this user guide.
Documentation - folder with the user guide.
Installable WordPress file only
Kurt.zip - main theme file. You can install it through WordPress admin
panel. If you install it via FTP then unzip it first and use the extracted folder.
Installation
There are 2 ways on how you can install WordPress themes – using WordPress admin panel or
using FTP upload. The first method is probably the simplest installation method for the most
of users. Let’s figure it out
Installing via WordPress Panel
Follow the steps below to install theme through WordPress admin panel:
Step 1: Login your WordPress admin dashboard
Step 2: Navigate to Appearance > Themes
Step 3: Click on Upload Theme
Step 4: Click on chose file, select "kurt.zip" and click Install Now.
Step 5: After upload is finished, click on Kurt to Activate
Installing via FTP Upload
If you would like to install the theme via FTP, follow the next steps:
Step 1: Login to your hosting server via FTP client.
Step 2: Go to the folder /wp-content/themes
Step 3: Upload "kurt.zip" extracted content
Step 4: Login your WordPress admin dashboard Upload Theme
Step 5: Navigate to Appearance > Themes
Step 6: Click on Kurt to Activate
Note
After you install and activate Kurt, you need to setup some couple of things to use
it best condition. Please follow these documentation.
Install plug-ins
If installation was successful, you'll see a notice about required plugins for Kurt, to
proceed click "Begin installing plugins".
You'll see a list of plugins, select them all and choose Install and then hit
Apply button. If everything will go OK, you should see them in Plugins » Installed
Plugins list in wp-admin and you should activate all the new plugins.
Set Up Elementor
After you have installed plugins, you need to set up some settings in Elementor. Go to Dashboard » Elementor » Settings » General and check options like on image below:
Importing Demo Content
If you want to have the same content on your website as Live Preview of Kurt theme, you'll need to import demo content.
To do that please go to Tools » Import » WordPress, install WordPress importer plugin if necessary and go to main theme package folder, demo-data folder, open the import file import.xml and proceed importing the file.
Please make sure you check Download and import file attachments before you click Submit
After the content was succesfully imported, you need to setup the site menu. Please read more about how to setup the Primary menu below.
Note
Some photos included with import file may be blank since they are used only for demo and we do not have distribution rights for them.
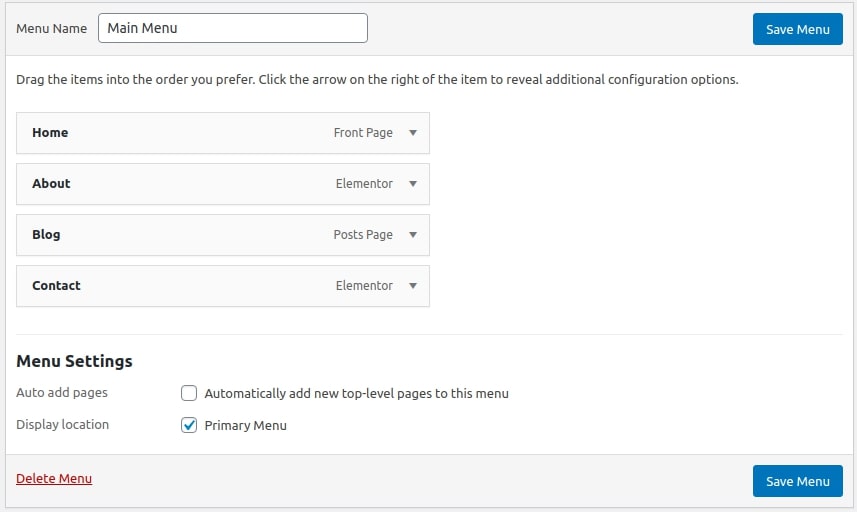
Setting up the Primary Menu
Go to Appearance » Menus, and make sure you have at least a menu created and set it as 'Primary Menu'. If you have multiple menus Kurt will pick the first menu defined. If you have no menu created, go ahead and create one.
Setting up the front and blog page
Go to Settings » Reading, and select the front page you wish to have for your website.
Configuring Contact Form 7 plugin
Go to Settings » Reading, and select the front page you wish to have for your website.
Then at the top of page you'll see the shortcode, for example:
[contact-form-7 id="824" title="Contact Form"]
Theme Settings
All the global theme options can be configured in Customizer (WordPress admin dashboard -> Appearance -> Customize). The options are grouped in several sections, outlined below.
General Settings
General settings described below:
Load Pages With Ajax - When navigate loads the target content without reloading the current page.
Enable Smooth Scrolling - Enable or disable smooth vertical scrolling.
Enable Preloader - Enable preloader while the page is loading.
Enable Follow Cursor - Enable circle that follows cursor.
Email Address - Email Address to be shown inside menu's company info.
Phone Number - Phone Number to be shown inside menu's company info.
Address - Address to be shown inside menu's company info.
Social Links - A set of social icons and URLs to the social or networking sites which are displayed inside menu's company info.
Header Settings
Header setting described below:
Header Logo - Upload your logo to be displayed at the left side of the header menu.
Footer Settings
Footer settings described below:
Copyright Text - Any html content (usually a copyright text) displayed in the copyright section of the footer.
Enable Back To Top Button - Enable or disable footer button which scroll page to top.
Back To Top Caption - Caption displayed next to the back to top button in the footer.
Portfolio Settings
Portfolio settings described below:
Showcase Portfolio Link Text - Caption of the showcase portfolio link.
Custom Slug - Kurt's portfolio post types are using 'kurt_portfolio' slug for permalinks you can change that value in here. Note: After you change this setting maybe you need to update your permalinks once. This is done by going to Settings » Permalinks and clicking Save Changes
Next Project Caption - Caption of the next project in portfolio navigation.
Blog Settings
Blog settings described below:
Next Post Caption - caption of the bottom navigation button linking to the next single blog post page.
Previous Posts Page Caption - caption of the bottom navigation button linking to the previous single blog post page.
Next Posts Page Caption - caption of the button linking to the next blog posts page.
Defaults Posts Page Sub Title - Sub Title of the blogs list page.
Defaults Posts Page Title - Title of the default blog posts page.
Error Page Title - The title displayed in the error (404) page.
Error Page Info Text - Error message describing why the error occured.
Back Button Caption - the message displayed with the 'Back to website' button.
Back Button URL - url of the home website.
Creating Content
Elementor Page Builder
Elementor is a visual page builder plugin for WordPress enabling the creation of web pages in a live, visual way. It replaces the basic WordPress editor with a live frontend editor, so you can create complex layouts visually, and design your website live, without having to switch between the editor and the preview mode. The page builder enables you to reach a top-notch quality of design without needing to use code or CSS, and without relying on developers for help. For more information, please check this tutorial.
In Elementor Builder you will see some tabs named;
Basic - Basic Elementor page building elements.
Pro - Elementor Pro page building elements.
General - General Elementor page building elements.
Site - Site elements, requires pro licence for Elementor.
Woocommerce - Woocommerce elements, requires pro licence for Elementor.
Kurt Theme - Some content elements specialized only for Kurt Theme.
There are 2 types of page templates available in Kurt:
Default template - This is the default template.
Showcase template - This page template displays all the Kurt portfolio items using the fullscreen showcase slider.
Portfolio Options
Include In Showcase Slider - Include this portfolio item in the Showcase slider. The slider is displayed in Showcase page template.
Hero Image - Upload hero background image. The hero image is being displayed in portfolio showcase. Hero section is the header section displayed at the top of the project page.
Hero Caption Subtitle - Caption subtitle displayed over hero section. Enter plain text.
Hero Caption Title - Caption title displayed over hero section. The hero background image is set in the hero image set in preceding option.
Pages
Pages in Kurt Theme is build with Elementor page builder. The steps of creating pages are as shown in video below:-
Portfolio
Pages in Kurt Theme is build with Elementor page builder. The steps of creating pages are as shown in video below:-
Spacing between Elementor
Spacing in Kurt Theme can be done using 2 ways. Either you can use elementor spacer widget or you can use spacing classes that comes with Kurt. The CSS classes are as follows:-